How to Install a Garbage Disposal
A garbage disposal makes it easier to get rid of certain types of food waste and keep your kitchen clean. Many types of garbage disposals begin to wear out after more than a decade. This guide reviews how to install a garbage disposal, either for the first time or when you need to replace an old one.
Tip: Check with local codes before attempting to install a garbage disposal. Some communities have plumbing codes that don’t allow disposals because of limits on sewer capacity. They may also require an air gap if the disposal is used with a dishwasher.
Need supplies fast? Order before noon for convenient scheduled same-day delivery.
Wire the Disposal
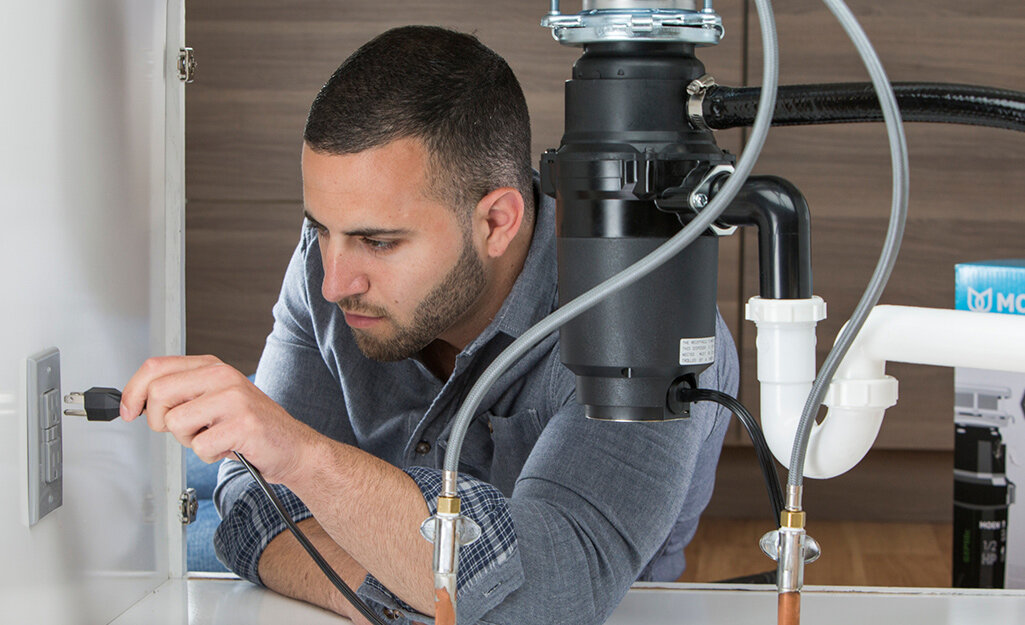
Begin to install a garbage disposal by removing the appliance from the packaging.
Read the installation instructions in the owner's manual to identify the disposal parts and wiring colors.
Disconnect the power at the circuit breaker.
Identify and remove the cover plate on the under side of the disposal.
Connect the power cord if the disposal doesn’t come with one.
Most cords and disposals have the same colored wires. Connect white to white, black to black and the green wire to the disposal’s ground screw.
Tip: Choose a garbage disposal based on its size and horsepower, matching them to your household’s needs.
Insert the Drain Flange

Many garbage disposals will require a new sink drain flange, which consists of the metal disk at the drain entrance at the bottom of the sink as well as a short length of pipe that extends below the sink, where the drain attaches.
Roll a rope of plumber’s putty of about 3/8 inches in diameter and press it onto the underside of the drain flange.
From above the sink, insert the flange into the drain hole and press down evenly.
Attach the backup ring, the fiber or rubber gasket and the mounting ring to the flange from beneath the sink. Make sure you snap the backup ring in place.
Tip: Place a heavy object such as the disposal itself in the sink to weigh down the flange and keep it from moving during installation.
Install Mounting Ring

Align the rubber or fiber gasket between the bottom of the flange and the mounting ring.
Tighten the mounting screws for the upper mounting ring.
Alternate the tightening of the screws to pull the ring up evenly against the underside of the sink. The gasket will create a water-tight seal.
Mount the Disposal

Raise the disposal and attach it to the mounting ring. Consider propping up the disposal with a sturdy object while working.
Make sure the disposal outlet faces the drain pipe connection.
Turn the lower ring clockwise until the disposal is supported by the mounting assembly.
Insert a screwdriver or disposal wrench into the mounting bracket on the lower mounting ring.
Turn clockwise until the disposal is locked into place.
Connect Outlet to P-Trap

Measure the discharge tube and, if needed, use a hacksaw or tubing cutters to cut the pipe to length. Not all disposals are the same size.
Attach the discharge pipe, or P-trap, to the disposal outlet with pipe connectors as instructed.
Tip: If the disposal has a line to the dishwasher, remove the plastic drain plug (or "knockout") from the disposal inlet before mounting the disposal. When you attach the P-trap, also attach the dishwasher discharge tube to the inlet.
Tighten Fasteners and Test for Leaks

Tighten all fasteners at pumbing and mount connections.
Run water into the sink.
Turn on the disposal and check for leaks.
Tighten the fittings if necessary.
Tip: Plug the sink with a stopper, fill with about an inch of water and check the flange and drain for leaks.
How to Remove a Garbage Disposal

If you’re replacing an old disposal, you’ll need to remove it before installing the new one.
Shut off power at the circuit breakers.
Disconnect the drain trap from the discharge tube. Disconnect the disposal from the dishwasher connection if necessary.
Detach the disposal from the mounting ring. Consider placing a sturdy object directly underneath the disposal to help support its weight.
Remove electrical cover plate and detach the disposal from the electrical connections.
Remove the mounting assembly if necessary.
Remove the flange from above the sink drain and any old plumber’s putty. If the flange sticks, grip the lower end of the flange with adjustable pliers and rotate the flange one-quarter turn to unseat the plumber's putty
Tip: Position a bucket under the pipes before detaching them to prevent spills.
Garbage disposal installation is a straightforward process, especially if you follow all steps and all garbage disposal parts are in working order. As long as you use the garbage disposal for getting rid of the recommended types of waste, it will help your kitchen look its best.
When shopping for new appliances, remember that homes built before the year 2000 use 3-prong plugs, and those built after 2000 use 4-prong plugs.
When you add professional installation to your new appliance purchase from us, the delivery agent carries both types of cords to make sure your home is covered. If you purchase a new appliance from us without opting for professional installation, we’ll provide a 4-prong cord. If your home is equipped with a 3-prong outlet, you will need to purchase a 3-prong cord or connector adapter separately.
Ready to find the supplies you need in your local store? Use The Home Depot app to locate products and check inventory. We'll take you to the exact aisle and bay.